Hello guy’s ! How are you?… I know you are also fine. Today we want to discuss different topics. I know you are an engineer, so the information that I am going to give you is discuss error.
The mechanical engineering have lots of branch and here we will explain with you all detailed knowledge of mechanical engineering with the help of easy notes.
Definition of error:-
The difference between true value and measured value of a measured quantity.
Error = True value – Measure value
*Source of Error :-
1) Perfections of instrument designing.
2) Lack of skill in the operate.
3) Wrong method of measurement
4) Invironmental effect.
5) Surface finish of object.
6) Because of properties of object.
7) Caused by the measuring forces of instrument.
*Types of errors :-
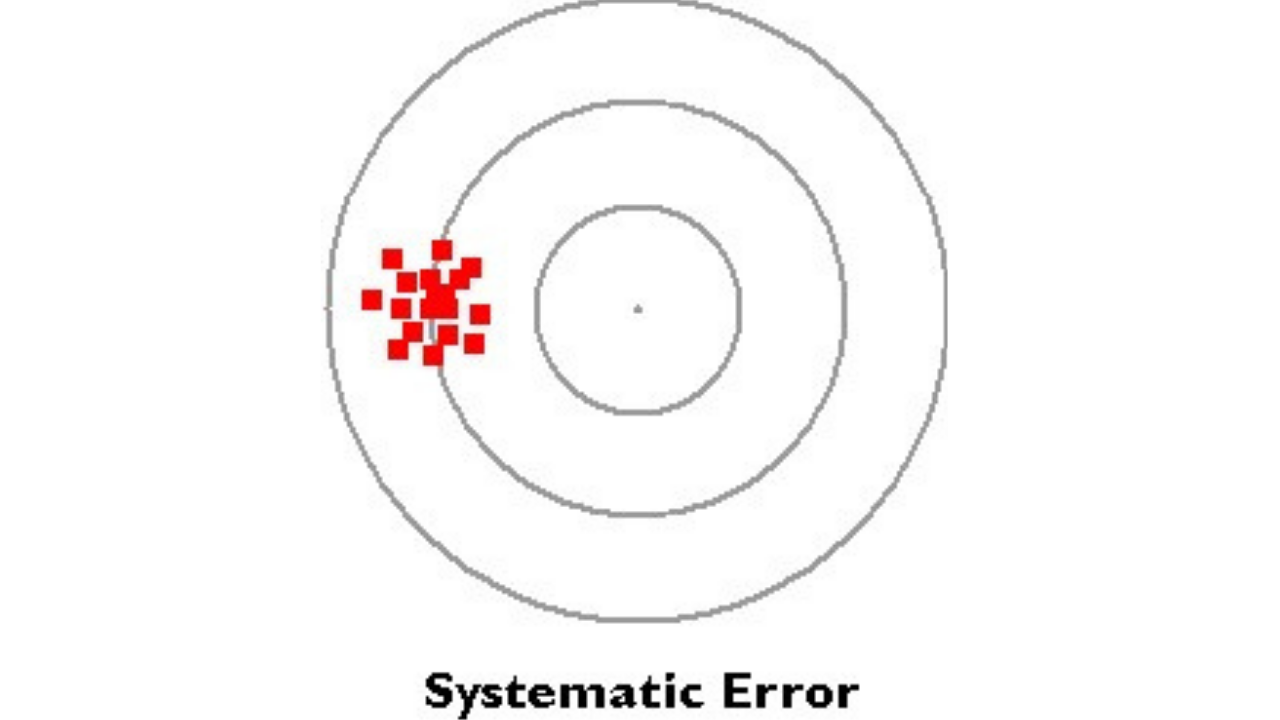
1) Systematic error (Controllable).
2) Random error. (uncontrollable).
1) Systematic error :-

Definition : The systematic are in the form of experimental mistake. These is controllable in magnitude are senses these have a definite value at the time of measure.
e.g. calibration , experimental arrange mental , Stills pressure etc.
2) Random error : –
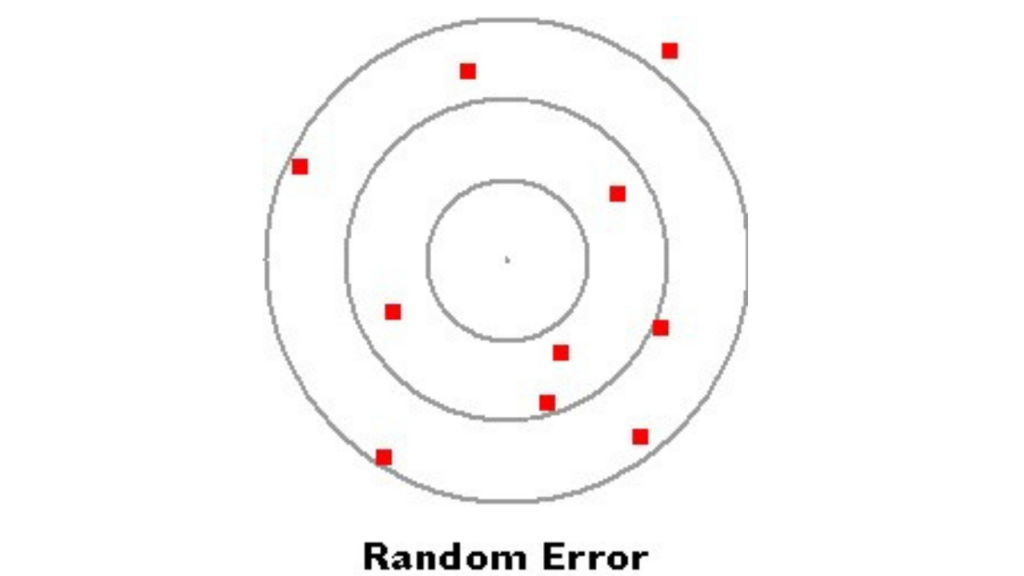
This types of occurred randomly,and they can not be determine.
eg. Flection of instrument, displacement of jaws, operator etc.
3) Support error :-
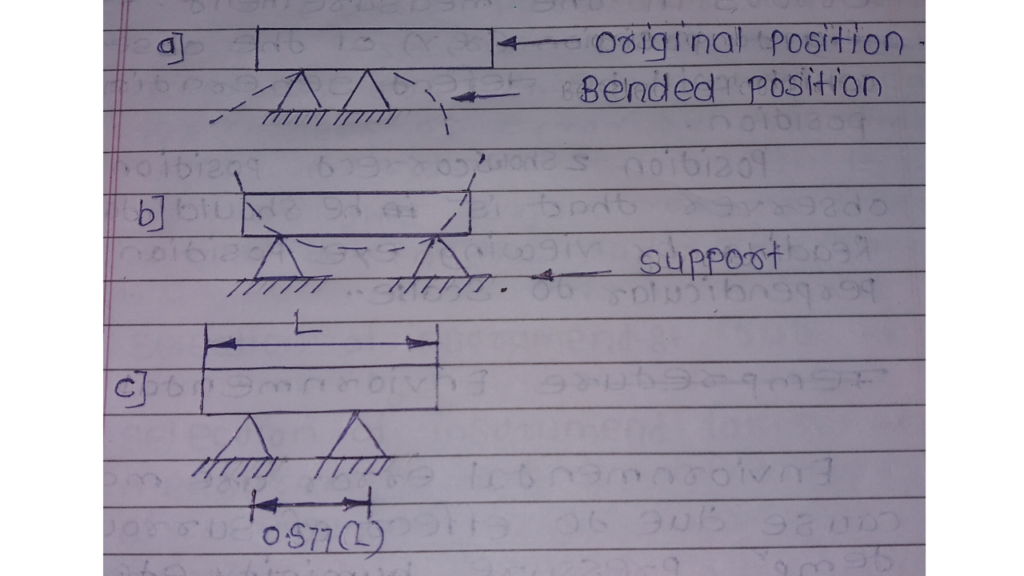
In case of long bar at the time of supports them is cause bending as shown in fig. a & b. fig a & b shows entering case of bending that are low distance and high distance are Support.
For bar of length supported equidistant from the center on support, for no Slop at the length as shown in fig c.
4) Parallax Error :-
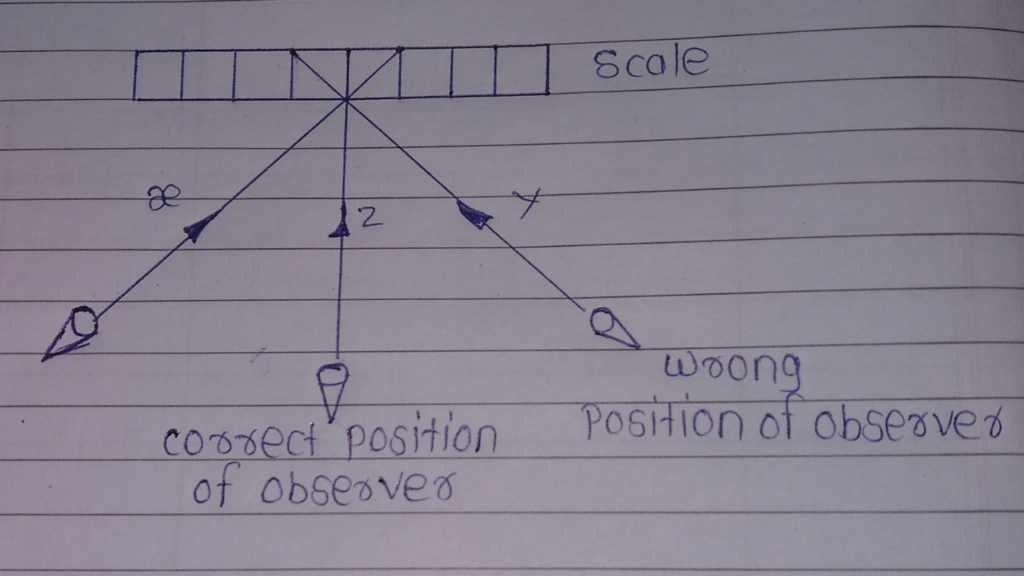
The position of observer at the time of taking reading may create in the measurement fig to position (x, y) of the observer which will be defected generating position.
Position z shows position of the observer that is he should take reading by viewing eye position exactly perpendicular to scale.
5) Environmental error :-
Environmental are maybe because due do effect of surrounding temperature pressure humanity etc.on the measuring instrument.
For, that purpose jobes are care air controlling room for International temperature expected is 20° for all instrument which are calibrated at that same temperature.
6) Contact pressure error :-
If measuring jaws of an instrument apply more pressure on the verifies them in deform elasticity.
These general in measurement for these purpose the verifies should be use between daws with proper pressure.
7) Dirt error :-
Dirt particular can enter the inspection room through door, windows etc.This particular creates for changes at the time of measurement.
For, this purpose very is lording are done be in the dust proof room.

Wonderful sir ??
Thank you ??